• Tutorials
    • Forms, Navigation
    • Forms, Popup and Context Menus
    • Forms, Color of Fields
    • Forms, Changing the Font
    • Forms, Customizing
    • Forms, Printing Reports
    • Forms, Send Email
    • Forms, Help
    • Grids, Navigation
    • Grids, Scrollbars
    • Grids, Functions
    • Grids, Functions, Refresh
    • Grids, Functions, New Wizard
    • Grids, Incremental Search
    • Grids, Selecting Multiple Records
    • Grids, Find and Find Next
    • Grids, Filters
      • Filters, Creating a New
      • Filters, Getting Fancy
      • Filters, Saving and Reusing
      • Filters, Default Filters
    • Grids, Printing Reports
    • Grids, Customizing
    • Menus, Shortcut Keys
    • Forms, Form Letters
      • How to print a Form Letter, Richtext
      • How to print a Form Letter, PDF
      • How to create your own Form Letter
  • Webinars
  • Training
    • Windows XL Training
    • Mobile Delivery
  • What’s New
  • Follow us on Twitter

TeamDME! XL Help

  • System
    • Company
    • Postal Codes
    • Task
    • User Security
    • Dashboard
    • Report Designer
  • Inventory
    • Item
    • Item Category
    • Item Department
    • Item Manufacturer
    • Item Location
    • Tracked Item
    • Activity
      • Physical Count
      • Item Adjustment Edit
      • Service Transaction Edit
      • Item Transfer Edit
    • Reports
  • Orders
    • Diagnosis Code
    • HCPCS Procedure Code, Edit
    • HCPCS Procedure Modifier
    • HCPCS Coverage Criteria List
    • HCPCS Fee Schedule
    • Physician
    • Payor
    • Therapist
    • Facility
    • Quote
    • Medical Order
    • Point-of-Sale
    • Recurring
    • Claim Pending
    • Claim History
    • Reports
  • Receivable
    • Customer
    • Salesperson
    • Referral
    • Nonallowed Reason
    • Responsible Reason
    • Adjustment Reason
    • Payment Type
    • Payment
    • Reports
      • Aged Receivable Reports
      • Revenue Reports
      • Audit Reports
      • Finance Fee
      • Customer Statement
      • Collection Letter
  • Purchase Orders
    • Purchase Order
    • Purchase History
  • Payables
    • Vendor
    • Unposted Invoice
    • Unpaid Invoice
    • Reports
      • Aged Payable
      • Open Payable
      • Cash Requirements
      • IRS 1099 Forms
  • Ledger
    • Chart of Account
    • Journal Unposted
    • Journal History
    • Bank Register
    • Reports
      • Balance Sheet
      • Income Statement
      • Trial Balance
  • Windows
You are here: Home / Receivable / Payment / How to Enter a Payment at Time Of Service.
«« Print Refund CheckHow to Import an Electronic Remittance Advice (ERA) »»

How to Enter a Payment at Time Of Service.

Sometimes customers will want to pay for items at the time it is received or ordered. This will be normal if the items are Self pay, or the patient may want to pay their 20% copay. This payment may be entered while you are entering the order or marking the items delivered, if you have the Point-of-Sale module.
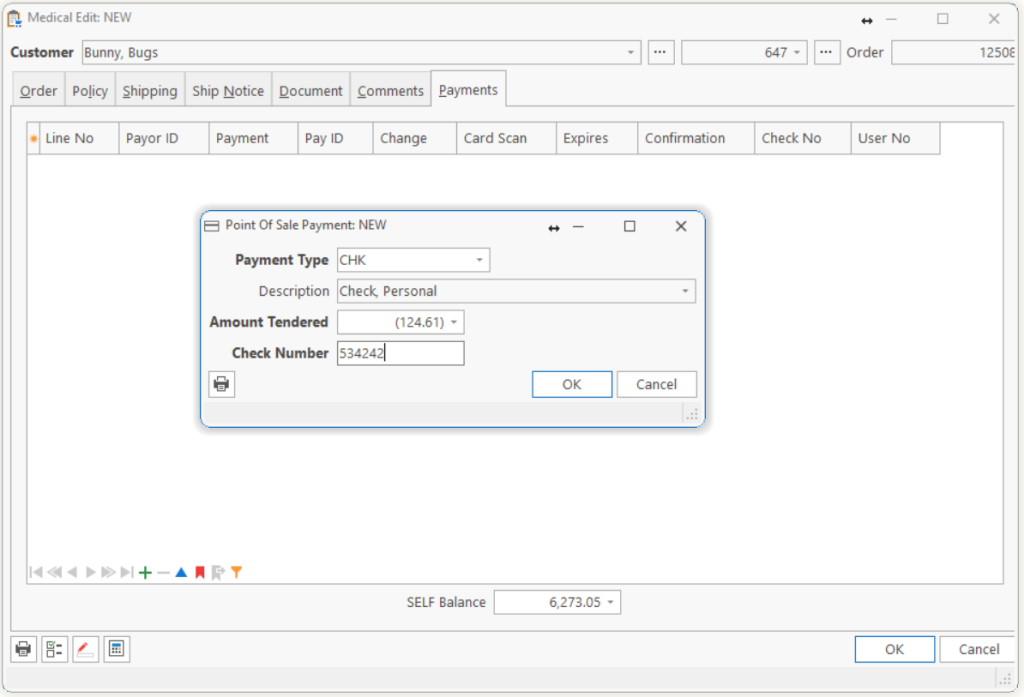
Step 1 Add a payment, by selecting the Payments tab from the Medical Edit form and adding a new payment record by clicking the Add button or pressing Ctrl-N.
Step 2 Select the Payment Type for the payment you received (Example CHK for Check).
Step 3 Enter the Amount Tendered. If the payment received was more than the amount of the order, the change to return to the customer will display in the Change To Give field.
Step 4 Some payment types ask other questions. For example, VIS (Visa) asks for the card number, expiration date and card holder’s name when credit card verification is installed.

Tip: If you don’t see the Payments tab, you may not have the Point-of-Sale module installed.

Page Tags: How, Payment, POS
«« Print Refund CheckHow to Import an Electronic Remittance Advice (ERA) »»

Tell us what you think. Cancel reply

You must be logged in to post a comment.

RETURN TO TOP

Copyright 2014-2026 · TeamDME!, Inc. · All Rights Reserved · Log in