• Tutorials
    • Forms, Navigation
    • Forms, Popup and Context Menus
    • Forms, Color of Fields
    • Forms, Changing the Font
    • Forms, Customizing
    • Forms, Printing Reports
    • Forms, Send Email
    • Forms, Help
    • Grids, Navigation
    • Grids, Scrollbars
    • Grids, Functions
    • Grids, Functions, Refresh
    • Grids, Functions, New Wizard
    • Grids, Incremental Search
    • Grids, Selecting Multiple Records
    • Grids, Find and Find Next
    • Grids, Filters
      • Filters, Creating a New
      • Filters, Getting Fancy
      • Filters, Saving and Reusing
      • Filters, Default Filters
    • Grids, Printing Reports
    • Grids, Customizing
    • Menus, Shortcut Keys
    • Forms, Form Letters
      • How to print a Form Letter, Richtext
      • How to print a Form Letter, PDF
      • How to create your own Form Letter
  • Webinars
  • Training
    • Windows XL Training
    • Mobile Delivery
  • What’s New
  • Follow us on Twitter

TeamDME! XL Help

  • System
    • Company
    • Postal Codes
    • Task
    • User Security
    • Dashboard
    • Report Designer
  • Inventory
    • Item
    • Item Category
    • Item Department
    • Item Manufacturer
    • Item Location
    • Tracked Item
    • Activity
      • Physical Count
      • Item Adjustment Edit
      • Service Transaction Edit
      • Item Transfer Edit
    • Reports
  • Orders
    • Diagnosis Code
    • HCPCS Procedure Code, Edit
    • HCPCS Procedure Modifier
    • HCPCS Coverage Criteria List
    • HCPCS Fee Schedule
    • Physician
    • Payor
    • Therapist
    • Facility
    • Quote
    • Medical Order
    • Point-of-Sale
    • Recurring
    • Claim Pending
    • Claim History
    • Reports
  • Receivable
    • Customer
    • Salesperson
    • Referral
    • Nonallowed Reason
    • Responsible Reason
    • Adjustment Reason
    • Payment Type
    • Payment
    • Reports
      • Aged Receivable Reports
      • Revenue Reports
      • Audit Reports
      • Finance Fee
      • Customer Statement
      • Collection Letter
  • Purchase Orders
    • Purchase Order
    • Purchase History
  • Payables
    • Vendor
    • Unposted Invoice
    • Unpaid Invoice
    • Reports
      • Aged Payable
      • Open Payable
      • Cash Requirements
      • IRS 1099 Forms
  • Ledger
    • Chart of Account
    • Journal Unposted
    • Journal History
    • Bank Register
    • Reports
      • Balance Sheet
      • Income Statement
      • Trial Balance
  • Windows
You are here: Home / Receivable / Payment / How to Enter a Payment from a Customer (Payment-On-Account)
«« How to Enter a Payment from a Customer.How to Enter a Payment by Credit Card. »»

How to Enter a Payment from a Customer (Payment-On-Account)

As a rule, when you send a Customer a Statement, they will return the Statement with their payment of the balance. You could enter a payment to each of the several line items to multiple Claims/Invoices, but there’s a better way. You can enter the payment amount and allow the system to mark all Invoices to pay.

Tip: The system will mark Invoices beginning with the oldest balance and marking payments until the payment amount is exhausted. Any credit amounts will be accumulated into the balance as it rolls forward.

Step 1 Wand the barcode in the lower right corner of the Customer Statement. This will display the Check Edit form for the Customer.
Step 2 Enter the payment in the Check Edit window.
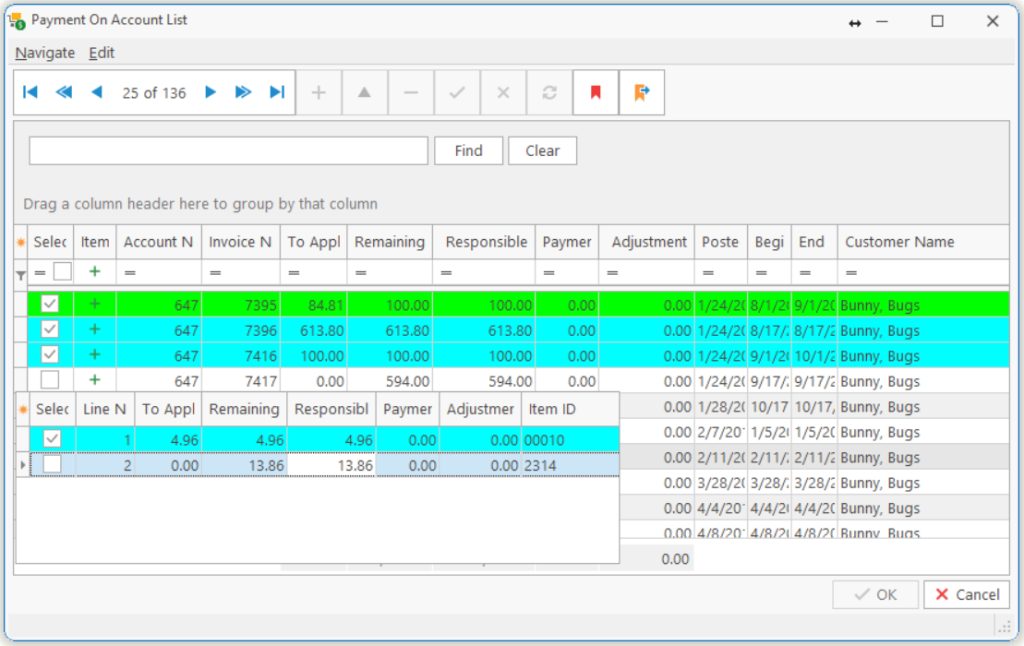
Step 3 From the Payment List, click Edit, New Payment on Account which will display the above window. You can choose which Invoices should be paid with the checkbox beside each Invoice. You can also choose to pay one or more lines from an Invoice by clicking on the plus [+] button, with the checkbox beside each Line Item.
Page Tags: Customer, How, Payment, POA
«« How to Enter a Payment from a Customer.How to Enter a Payment by Credit Card. »»

Tell us what you think. Cancel reply

You must be logged in to post a comment.

RETURN TO TOP

Copyright 2014-2026 · TeamDME!, Inc. · All Rights Reserved · Log in